THE GREAT RANGES ARE BIG AND INTRICATE. The Himalayas, Alaska Range, and the Andes are an order of magnitude far more complex than your local climbing area or regional peaks. It’s why we travel halfway around the world to go to those places. Even the most popular route on a big peak demands an exploratory approach. The amount of info can be overwhelming—you need something the size of a textbook to cover all the ins and outs of a single section of a big range. While it can be daunting, just remember that it’s part of the expedition game.
Trekking efficiently, finding basecamp, and picking the right route requires the ability to route-find and navigate this complex terrain. While mountains are as much about adventure as achievement, it’s a good idea to plan ahead, research, and practice navigation skills before leaving home. This due diligence will keep you on the road to success and safety.
As a big mountain guide and owner of Madison Mountaineering, Garrett Madison says, “There are two types of expeditions in regards to route planning. Peaks that have been climbed before and those that are unclimbed. How you go about finding the best route to the mountain and to the summit are different but rewarding in their own ways!” Below we will lay out how to prepare yourself from before stepping foot outside your door to returning to town after a climb attempt—that hopefully includes a successful summit.
PLAN AND PRACTICE
Months before you step on the plane, spend a lot of time researching and planning your approach and climb. Read books and acquire maps of the area. Brush up on your navigations skills, practice on your compass and topo map. Get accustomed to analog maps. Read every scrap of information you can find in the American Alpine Journal, The Himalayan Journal, and the Alpine Journal. Compile the information with printouts in a folder. By the end of your trip, this folder should hold topos, route info, visa forms, receipts, and other critical material. Have these copies on your phone too, but having paper in hand in a foreign country is invaluable.
Develop a big picture of the region, the mountain, and the climb. List specific and overall challenges. Obstacles and terrain hazards might include a road that frequently washes out in the monsoon, a river that floods in spring, a calving glacier, crevasse-filled serac bands, and so on. Build a timeline that considers these factors, meaning when you might encounter them on your journey. Incorporate multiple options, alternate routes, and other climbing objectives. Have a Plan B for every situation and contingency. Quite often, Plan B ends up saving a summit, or even lives. This detailed planning will prepare you for the worst so you can anticipate the best. Here are some pointers:
Gather Information
Guidebooks, mountain journals, and articles can be found in libraries or online. Start general and progress through the more specific. General travel guides like Lonely Planet and Rough Guides provide an overview of your host country with details on your mountain destination. Specific guides to trekking or climbing destinations will exist for the range in question.
Luke Smithwick, a world-traveling big mountain skier, says, “I start with the region and read everything I can about it. You can take the name of a town or lake or mountain and search on Google and get some leads.” Once you have some names, dig deeper. Luke adds, “You’ll usually find some information on the climbing or a climber’s name. I call or email folks; they’re pretty cool about sharing info.”
Once you narrow your search, you’ll find more specific info like topos, approach, basecamps, etc.
Research
Websites like MountainProject.com and SummitPost.org are good starter resources for peak and route information. At the very minimum, these sites can point you in the right direction of more thorough resources. General online searches can reveal trip reports and key info. If you’re researching your first expedition, chances are that information will be easy to find. Madison says, “For any peak that has been climbed and recorded somewhere (like in the AAJ), generally you can find good route info to use. Highly popular peaks have routes that are climbed nearly every day of the summer and sometimes these routes become a trail hard to lose!” Unclimbed routes or exploratory expeditions demand deeper research. “When I’m approaching an expedition to an unclimbed peak, I’ve done reconnaissance by helicopter, by trekking around the peak and taking photos, by using Google Earth, or by talking to other climbers who have attempted it and have some knowledge,” Madison says.
If you are a member of the American Alpine Club, you will have access to the Henry S. Hall Jr. American Alpine Club Library (https://americanalpineclub.org/library). Your membership provides you with 30 minutes of research free of charge from an AAC Library Staffer, over the phone or via email. More intensive research maybe be arranged for a fee.
Find Maps
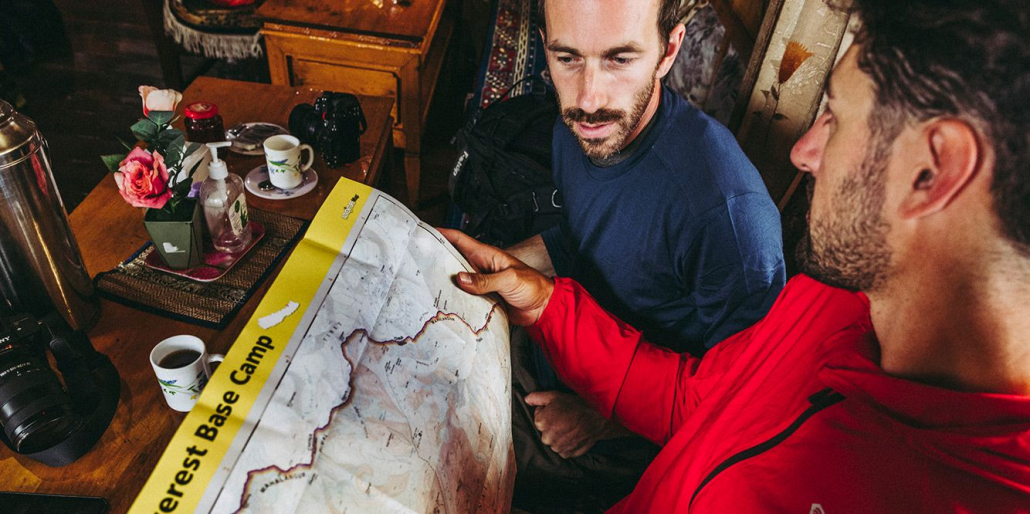
Maps have come a long way from paintings on cave walls and parchment scrolls. Yet a map’s purpose is the same as it’s ever been—to graphically depict relationships between physical objects and terrain. We now have two types of maps: physically static and dynamic/interactive. One is printed; the other is on a GPS, smartphone, or other digital device. Be adept with both. The latter works fine in the regular world, but beware of electronics in the real mountains. Batteries die, chargers fail, and the sun might decide to hide when you break out the solar panel. Competence with an analog map and compass takes practice, but having a conceptual grasp is like building basic navigational grammar. Make a hard-copy map. Laminate it in plastic. Keep it in your pack. Take a class and practice in your local hills and crags.
Take an Intro to Navigation class ›
Take a Map Reading class ›
Link To Free Downloadable Maps ›
Books
Guidebooks are invaluable. They retain detailed and organized information that can’t be found in a single online source. While it’s appealing to explore websites, the amount of subjective, scattered, and dated information is overwhelming. Cherry-pick small details like conditions, closures, and key beta on websites and note them in your hard-copy guidebook. The Lonely Planet Trekking Guides are a great resource. The series includes the Nepal Himalaya, the Indian Himalaya, Karakorum, Andes, etc.
Use Google Earth
Google Earth is a fast and easy way to locate objectives, assess terrain, and map routes to the mountain. It’s also free! Drop markers, create a trail map, assess conditions over the years, and evaluate the difficulty of the trek. The newest version of Google Earth even has content creation tools. You can now share maps and stories with friends, partners, or coworkers and they can view it anywhere—their phone, tablet, or laptop. Smithwick swears by Google Earth. “Maps can help you find something, Google Earth helps you discover. I go there to explore the best way to get somewhere and maybe discover something I haven’t heard of.”
THE ROUTE PLAN
Take all the information you’ve gathered and build an itinerary and overall map. Break the expedition into sections, starting with the trek to basecamp, the approach to the climb, the climb itself, and the descent. Make safety your first consideration. Madison says, “Safety on the route is most important. Every step of the journey—from the trek, to crossing the glacier, to climbing the route, to choosing camps—put safety first.”
On your hard-copy map, you can jot down key notes like where to camp, how many miles each segment is, elevation gain, and so on. If using Google Earth or a GPS, print the image in case of technology failure. Create a rough topo of the actual climbing route. Note features like ridges, towers, couloirs, seracs, and glaciers. Plot a course of ascent and add photos, which will allow you to get a sense of location while climbing.
Picking Basecamp
An ideal basecamp is the convergence of several factors, and not all mountains offer the perfect combination. Most will allow for the essentials—access, level terrain, and availability of water. On mountains that have been previously climbed, finding basecamp is as simple as reading the guidebook, journal accounts, or trip reports. For unfrequented peaks, choose basecamp according to the following criteria:
- Access to Route: Pick an area that is close enough to allow access to the base of the mountain in several hours.
- For mountains with long and complex access, consider placing an Advanced Basecamp.
- Level Terrain: Choose flat areas that have room for all tents.
- Access to Water: Pick a location with clean water, whether it’s a lake or stream.
- Sun Exposure: Try to place camp in an area with good sun exposure. Having the sun in the morning and through the day is vital for drying gear, warmth, and team morale.
- View of Route: The best basecamps allow for daily visual assessment of the mountain and the climb.
Route-Finding on the Mountain
When you arrive in basecamp, the on-mountain route-finding begins. Ideally, camp will allow convenient views of your objective. Mountains have daily rhythms and it’s good to get a feel for how it responds to changes in sun exposure and weather. Examine your route. Find vantage points that allow you to see any hidden sections of your climb. Use binoculars or better yet, a spotting scope, to get a closer look. Lavish expeditions have been known to use drones to examine conditions from the air.
On your initial foray onto the mountain, note terrain features, conditions, and optional paths in case of changes in conditions. Be thorough in plotting the best route. Even in remote regions, paths are often marked on topo maps. Avoid short cuts. These tend to create long and often dangerous episodes. One might be tempted to take a more direct line between point A and B to save time. But more common than not, shortcuts lead to rough terrain, steep ridges, and dead ends.
Again, plan with safety in mind. Madison says, “For safety, we try to keep to ridgelines, or a face of the peak that doesn’t have ‘hangfire’ above, like an ice cliff that could break loose and come tumbling down. I like to stay out of couloirs that are a natural funnel for rockfall or snow avalanches from above…. That said, sometimes that is the best way up, and staying to one side of the couloir is the most reasonable approach. When climbing glaciers, generally we try to stay in the middle and weave our way around crevasses, staying away from steep walls where avalanche debris could accumulate.”
SITUATIONAL AWARENESS
The monotony of the trek, the thin air, and fatigue can dull the senses. Once again, be alert and take mental note of key landmarks. Paying attention is the first line of defense against present and future mishaps. The vast majority of accidents do not happen from falls, gear failure, or an unexpected storm. They happen when people don’t pay attention. Avoid distractions in hazardous situations, like commemorative selfies below a serac or prolonged summit celebrations.
Plot landmarks on your physical map. Drop those on your device and record GPS coordinates. Keep an eye on nearby peaks to develop a sense of place. Advise other group members of location and have them note it on the map. Avoid splitting the group up on these initial forays—for safety and group cohesion. These basic measures create a shared base of knowledge and promote communication. As the expedition progresses, these elements might salvage a bad situation or save lives.
Mountain Terrain Features and Hazards
CREVASSES:
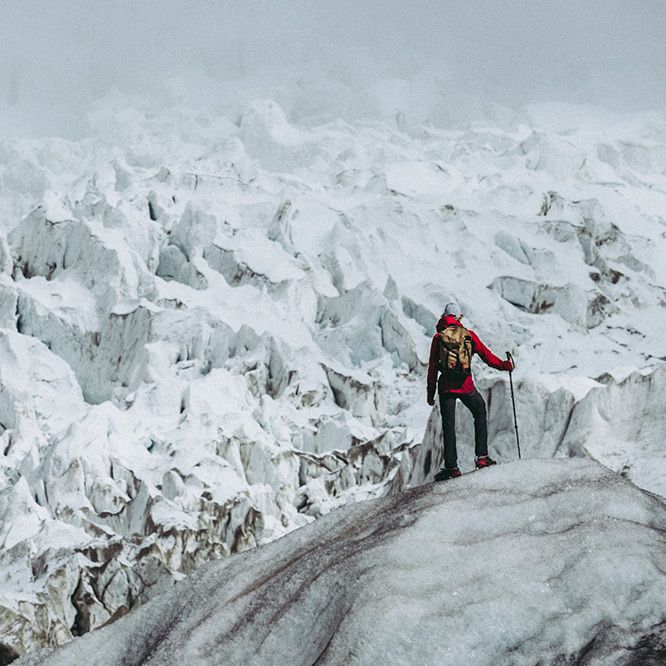
These cracks in glacial ice can range in size from a few inches wide to big and deep enough to fly an airplane into. Crevasses are formed as the glacial ice flows over underlying irregularities and cliffs, or turns through valleys and over ridges. These are often hidden by fallen snow or avalanche debris. Safely navigating through a system of crevasses—and being well-versed in crevasse rescue—is a basic skill for any mountaineer. Crevasses are often present where the angle of the glacier changes or takes a turn. Look for linear irregularities in the snow that run parallel to the angle change. Look for small cracks in the snow or ice that might hint at something bigger. Carefully probe with a ski pole or ice axe. Be trained in all the necessary gear and techniques before venturing out onto the real thing.
BERGSCHRUNDS:
A ‘schrund is a precipitous gap that forms at the very top of the glacier where the glacier ice meets the mountain. These obstacles often form the crux of an alpine climb. They, like crevasses, vary according to climatic conditions. It’s a good idea to have a close look to assess before launching into the climb itself.
SERACS:
Seracs are ice cliffs formed at the toe of hanging glaciers. These are often perched high on the mountain and have a nasty way of randomly falling. Falling seracs are less predictable than an avalanche. Avoid being under them.
AVALANCHES:
Sliding snow is a top killer in mountains. Any surface angle greater than 25 degrees that collects snow can slide in the right conditions. Though most avalanche accidents happen in slopes between 35 and 45 degrees, any angle up to 55 degrees is suspect.
Learn more›
Take an Avalanche Class›
ROCKFALL:
Like avalanches, rockfall is a major hazard. Factors that contribute to rockfall include bad (rotten) rock, sun exposure, rain, rapid temperature changes, other climbers, and bad luck. If you’re climbing or approaching below a rockfall area, move fast and wear a helmet. Climb early in the season when it’s cold or early in the morning.
ICEFALLS:
When meeting a high ridge or constriction in a valley, glaciers can pile up into jumbled masses called icefalls. These can resemble living, breathing creatures that, like seracs, can collapse at any time of day with no rhyme or reason. Avoid crossing these whenever possible.
COULOIRS:
Couloirs are steep gullies most often filled with snow or ice. Not only are they the escalators of a mountain (often providing the fastest route up or down), but they can also funnel falling rocks and ice into a veritable shooting gallery.
CORNICES:
Cornices are hanging lips of snow that form at the crest of a ridge. Usually generated by wind on the leeward side of a ridge, these can unexpectedly collapse. This is a problem if you are standing atop one or climbing below.
Plan your Descent
The climb isn’t over until you set foot safely back in basecamp. Having a descent plan is important, as you’ll be fatigued and prone to letting your guard down. It is wise to have an alternate descent in case of new snowfall or avalanche. These can be mentally plotted and added to your route topo while climbing up the mountain. Talk to your partners so your team will have a common understanding of the options. Consider how much downclimbing and rappelling the descent requires. Downclimbing is fast and safe, provided there is little avalanche danger. Rappelling is efficient, provided one has enough hardware for rock anchors or decent ice for V-threads.
Whiteouts
Whiteouts can happen in a storm or any local atmospheric event that creates low cloud cover, and they’re very common in the mountains. Not being able to see where you’ve been and where you want to go is an obvious problem. To mitigate whiteout hazards, consider the following:
- Use wands or cairns: Wands are bamboo or wooden poles you can stick in the snow to demarcate a path or mark a crevasse. Cairns—piles of stacked rock—play a similar role in drier sections of the mountain. Trust the markers you place yourself. Old wands might mark a crevassed path that is no longer safe. Cairns might lead to a herder’s cave vs. a trail to basecamp.
- GPS: You can mark locations with a GPS device but beware of dead batteries and a frozen/wet device. Once again, consider using a physical map and a compass.
- Record altimeter readings: Use elevation as a fixed, measurable point in your positioning and navigation.
- Stay roped up if the whiteout occurs in a hazardous area with crevasses or cliffs.
- Be patient and work through the terrain. If viable, hunker down and wait until the whiteout dissipates.
